- Nov 25, 2018
- admin
- 0
How To Create TestNG XML File And Execute TestNG.XML File
In this tutorial, you will learn How to Create TestNG XML file and how to execute Test cases from TestNG.XML file.
Create TestNG XML file:
In TestNG framework, we need to create Testng xml file to create and handle multiple test classes. We do configure our test run, set test dependency, include or exclude any test, method, class or package and set priority etc in the xml file.
Steps to create TestNG XML file
Step 1: Create testng xml file
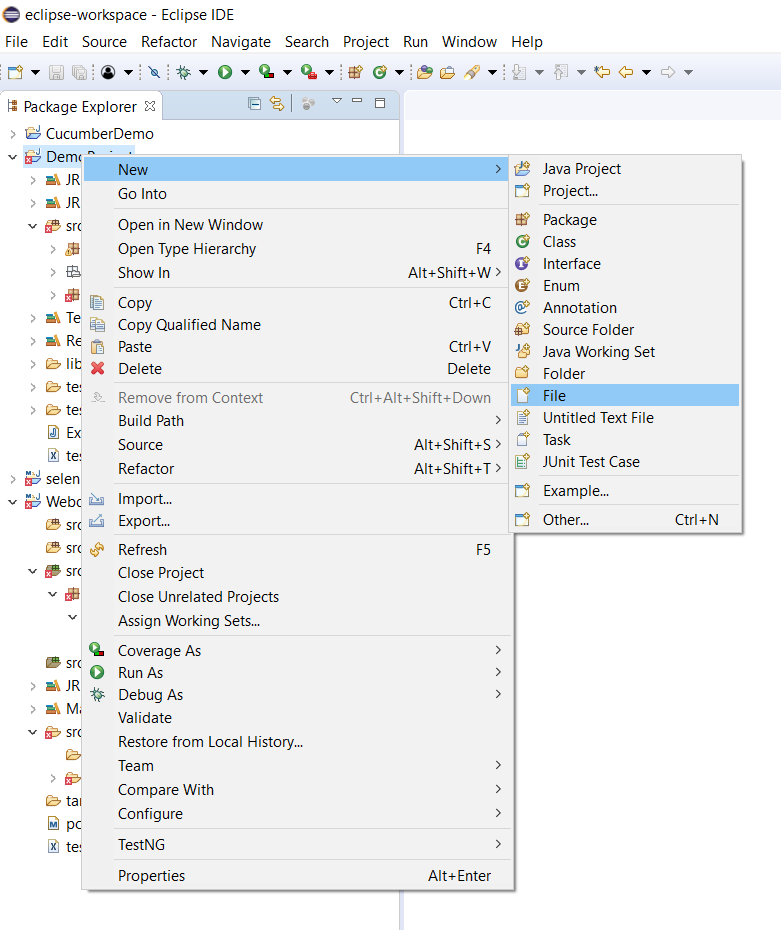
- Right click on Project folder, go to Newand select ‘File‘ as shown in below image.
- In New file wizard, add file name as ‘testng xml‘ as shown in below given image and click on Finish button.

iii. It will add testng xml file under your project folder.
Step 2 : Write xml code:
- Now add below given code in your testng xml file.
<?xml version=”1.0″ encoding=”UTF-8″?>
<!DOCTYPE suite SYSTEM “http://testng.org/testng-1.0.dtd”>
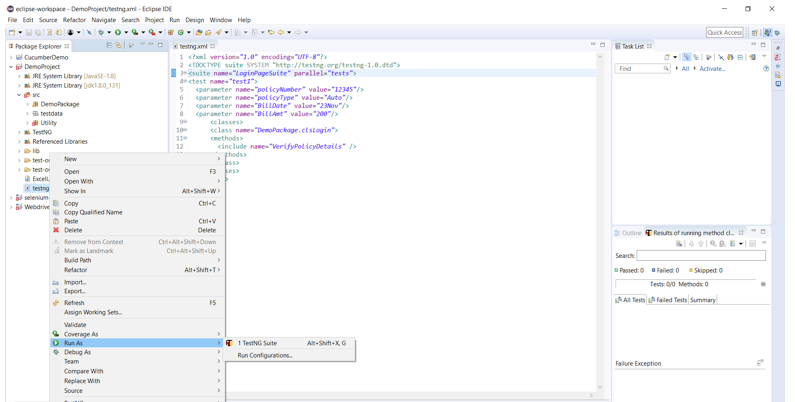
<suite name=”LoginPageSuite” parallel=”tests”>
<test name=”test1″>
<parameter name=”policyNumber” value=”12345″/>
<parameter name=”policyType” value=”Auto”/>
<parameter name=”BillDate” value=”23Nov”/>
<parameter name=”BillAmt” value=”200″/>
<classes>
<class name=”DemoPackage.clsLogin”>
<methods>
<include name=”VerifyPolicyDetails” />
</methods>
</class>
</classes>
</test>
</suite>
- Note:You can choose any name for your Test Suite & Test Name as per your need.
- After giving appropriate names, now your testng xml file will looks like this:
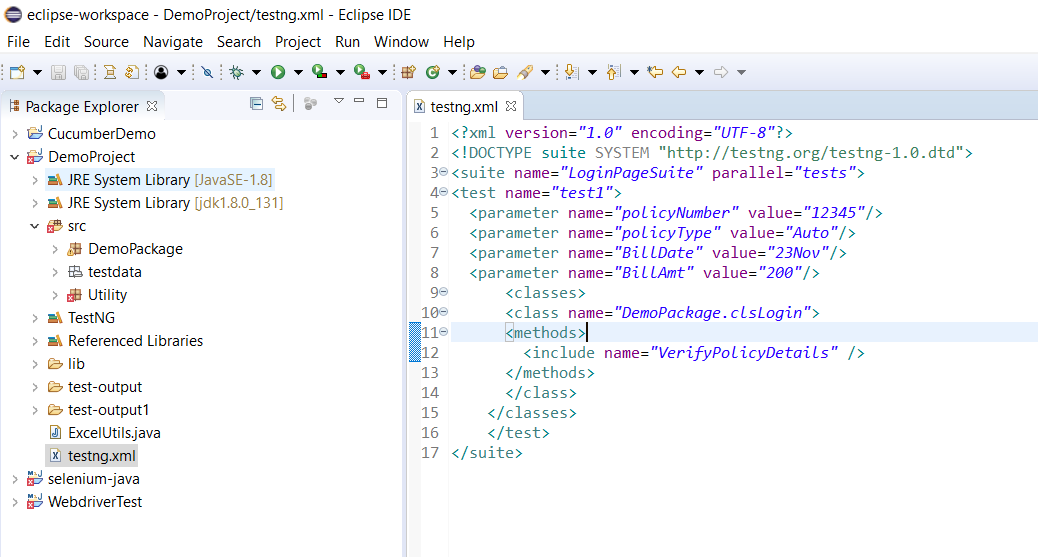
The hierarchy in the testng xml file is very simple to understand.
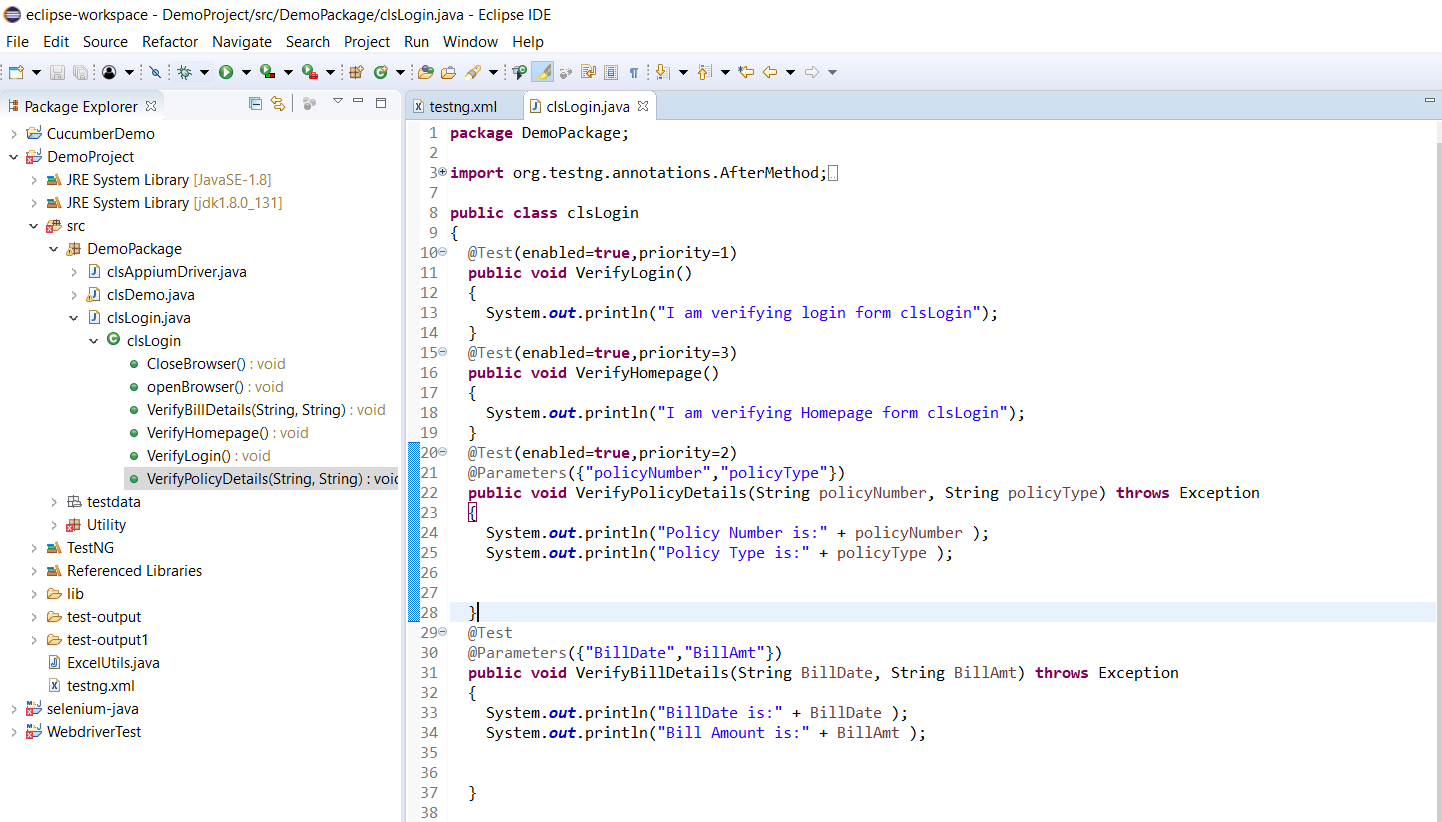
Very first tag is the Suite tag<suite>, under that it is the Test tag<test> and then the Class tag<classes>. You can give any name to the suite and the test but you need to provide the correct name to the <classes> tag which is a combination of your Package name and Test Case name.
- Package Nameis “DemoPackage”, Test Class Name is “clsLogin”. So the Class Nameshould be DemoPackage.clsLogin
Step 3 : Execute a testng xml
Now let’s run the xml. Run the test by right click on the testng xml file and select Run As > TestNG Suite.
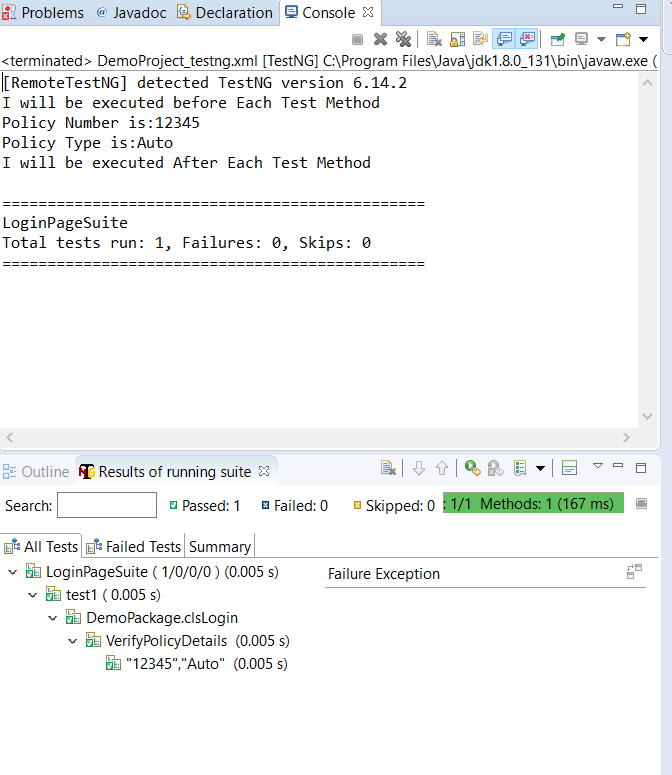
Once the execution is done, you could view test result under the TestNg console.