
- Jul 14, 2026
- admin
- 0
Setting Up Playwright with an LLM
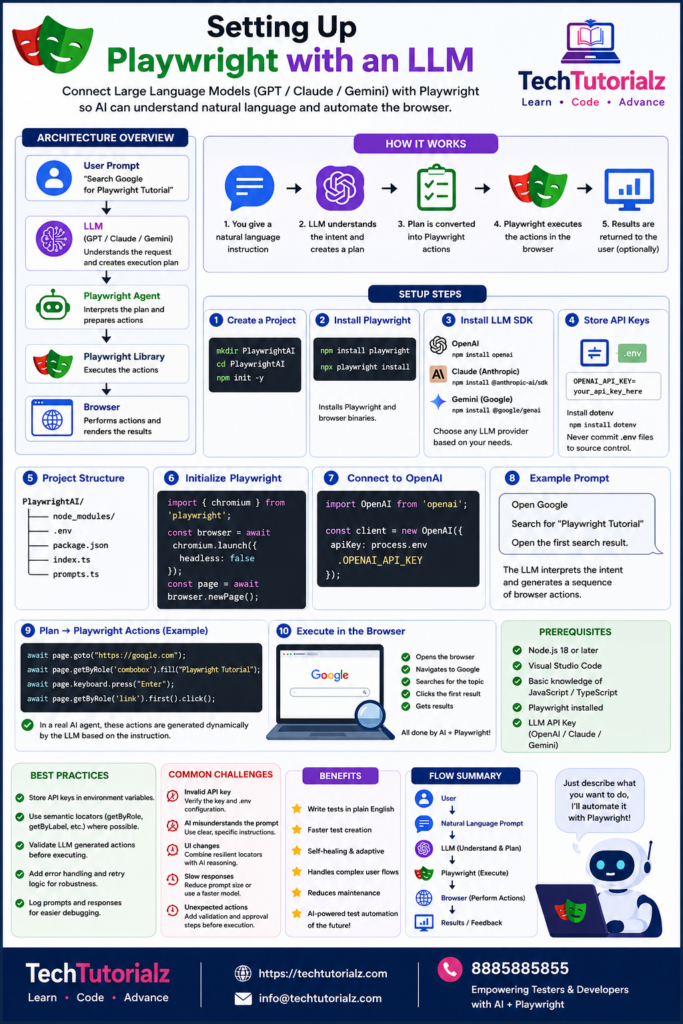
This chapter explains how to connect a Large Language Model (LLM) such as GPT, Claude, or Gemini with Playwright so that AI can understand natural language instructions and execute them in a real browser.
What You’ll Learn
By the end of this tutorial, you’ll be able to:
- Understand how an LLM interacts with Playwright
- Configure a Node.js project
- Connect Playwright with an LLM
- Send natural language prompts
- Execute browser actions using AI
Architecture
User Prompt
│
▼
“Search Google for Playwright”
│
▼
Large Language Model (LLM)
(GPT / Claude / Gemini)
│
Understands the request
Creates execution plan
▼
Playwright Agent
│
▼
Playwright Library
│
▼
Chromium Browser
Prerequisites
Before starting, ensure you have:
- Node.js 18 or later
- Visual Studio Code
- Playwright installed
- Basic knowledge of JavaScript or TypeScript
- An API key for your preferred LLM provider
Step 1: Create a Project
mkdir PlaywrightAI
cd PlaywrightAI
npm init -y
Step 2: Install Playwright
npm install playwright
Install browser binaries:
npx playwright install
Step 3: Install an LLM SDK
OpenAI
npm install openai
Anthropic Claude
npm install @anthropic-ai/sdk
Google Gemini
npm install @google/genai
Choose one provider based on your needs.
Step 4: Store API Keys Securely
Install dotenv:
npm install dotenv
Create a .env file:
OPENAI_API_KEY=your_api_key_here
Never commit .env files to source control.
Step 5: Create the Project Structure
PlaywrightAI/
│
├── node_modules/
├── .env
├── package.json
├── index.ts
└── prompts.ts
Step 6: Initialize Playwright
import { chromium } from ‘playwright’;
const browser = await chromium.launch({
headless: false
});
const page = await browser.newPage();
Step 7: Connect to OpenAI
import OpenAI from “openai”;
const client = new OpenAI({
apiKey: process.env.OPENAI_API_KEY
});
Step 8: Ask the AI
Example prompt:
Open Google
Search for “Playwright Tutorial”
Open the first search result.
The LLM interprets the intent and generates a sequence of browser actions.
Step 9: Convert the Plan into Playwright Actions
Conceptually, the flow looks like this:
await page.goto(“https://google.com”);
await page.getByRole(‘combobox’).fill(“Playwright Tutorial”);
await page.keyboard.press(“Enter”);
await page.getByRole(‘link’).first().click();
In a production AI agent, these actions are generated or selected dynamically based on the LLM’s reasoning rather than being hardcoded.
Step 10: Execute in the Browser
Playwright performs the requested actions:
- Opens the browser
- Navigates to Google
- Searches for the topic
- Clicks the first result
How the Complete Flow Works
User
│
▼
Natural Language Prompt
│
▼
LLM
│
▼
Understands Intent
│
▼
Creates Action Plan
│
▼
Playwright
│
▼
Browser
│
▼
Execution Results
│
▼
LLM (Optional Feedback)
Best Practices
- Store API keys in environment variables.
- Use Playwright’s semantic locators (getByRole(), getByLabel(), etc.) where possible.
- Validate LLM-generated actions before executing them.
- Add error handling and retry logic for robustness.
- Log prompts and responses to simplify debugging.
Common Challenges
| Challenge | Solution |
| Invalid API key | Verify the key and environment variable configuration |
| AI misunderstands the prompt | Use clear, specific instructions |
| UI changes | Combine Playwright’s resilient locators with AI reasoning |
| Slow responses | Reduce prompt size or use a faster model |
| Unexpected actions | Add validation and approval steps before execution |